Monday, September 6, 2010

Ropa Vieja aka "Old Clothes"


Hello, we meet again my pretties… 

These recipes are from one of my treasured cook books, “Daisy Cooks!” by Daisy Martinez.

So this is technically going to be a two-part recipe because in order to get one of the ingredients you must prepare for another. So let’s get this going because you might want to prepare this ahead of time to cut down on kitchen time. Ropa Vieja is going to take at least 3 hours in the kitchen but it’s sooooooooooooo worth it you’ll thank yourself at the first magically wonderful taste.

Part 1: SOFRITO!

You are going to need ½ cup of Sofrito when making Ropa Vieja, so you might as well make a batch ahead of time and freeze it in baggies containing a ½ cup each. Any recipe you currently already have can be dressed up with latin flavor by simply adding some sofrito, ie roasts, chicken, even rice! Also if you decide to go out and buy one of Daisy Martinez’s books you’ll always need it on hand. If you think you might be a little weary you can always cut the recipe in half or a fourth to just try it out…. but don’t whine when you wish you’d made more... This recipe makes about 4 cups.

You’ll need:

1 Food Processor
2 medium Spanish Onions (white works great) cut into large chunks
3 to 4 Italian frying peppers or Cubanelles
16 to 20 cloves of Garlic
1 large bunch of Cilantro
4 leaves of Culantro

*(this stuff is like “Cilantro x 10” , if you can’t find it at your farmer’s market, you can substitute this for another Whole bunch of Cilantro)

7 to 10 Ajices Dulces (optional)

*(aka “Cachucha” aka “Ajicitos” … these are sweet semi-spicy peppers. But don’t mistake them for scotch bonnet or habanero peppers ... they look really similar, and even come in the same color ranges so be careful and make sure you’re picking up the right ones because there is a HUGE heat difference between the two. If you mistake them you may be in for a rocket ride to the moon)

3 to 4 ripe plum tomatoes, cored and cut into chunks
1 large red bell pepper, cored, seeded, and cut into large chunks

Chop all the larger stuff into chunks and then process everything in the food processor until you get it smooth. Like mentioned before, this will give you 8 servings storing ½ cup in each small freezer bag. You can store it for up to 3 days in your frig, or in your freezer until you need it. Note that if you decide not to freeze it right away, it will smell up your frig (if you’re finicky like that, just go ahead and freeze it)

Part 2: ROPA VIEJA

So you know when you go to a Latin restaurant and ask for a shredded steak taco… this is pretty much it but with a little extra veggies in it. You can serve this with rice or on tacos, it would even taste great on nachos… or cold out of the pan at 3 am… it is beefy divinity. Cook time is at least 3 hours so make sure you’re prepared to wait because if you skip lunch thinking you can wait your hungry little stomach will hate you for it...

Also this is Daisy’s Cuban version, traditionally it’s made with Flank steak but she prefers the chuck roast. Either way it’s amazing. Makes 6 Servings.

Here’s what you’ll need:

1 large or 7QT Dutch Oven or Oven proof dish with lid
1 (2 ¼ or 2 ½ lb) Chuck Roast, or 2 (1 ¼ lb) Flank Steaks

3 medium Carrots, trimmed and cut into ¼ inch dice
1 cup fresh or frozen Peas

*(I already had chopped frozen mixed vegetables from the farmer’s market on hand --corn, baby limas, cut green beans, carrots, and peas---so this is what I used instead of the carrots and peas separately. 3 medium carrots is about 12 oz so that’s 1 ½ cups, adding the 1 cup of peas meant that my total of chopped frozen veggies to add was 2 ½ cups)*

4 medium or 2 large Celery stalks, with leaves, peeled, cut into ¼ inch diced (i only used half this)
1 small Onion

*(The original recipe simply tells you to liberally season your meat with salt, pepper, and onion powder. Just to complicate things… of course, I hate using onion powder… so in its placed I used a small white onion. This will be explained later.)*

2 (8oz) cans Spanish-style Tomato Sauce
½ cup Sofrito
3 Tbsp Alcaparrado or chopped Pimento-stuffed Olives

*(Alcaparrado is going to be equal parts chopped pimento olives and capers)

2 Bay Leaves
¼ tsp ground Cumin
1 ½ cup Water
3 tbsp Canola Oil + Olive Oil as needed
Black Pepper and Kosher Salt as needed/ to taste

Let’s Begin!!!!

So…. I’ve made this twice using the Chuck roast: A) because 2lbs of chuck roast is cheaper, and B) because I have not been left wanting so far! Mmm

Buuuut anyway… before you start chopping up all your veggies here's a trick! Not sure if you've ever noticed but celery can be stringy.... To avoid this all you have to do is take a potato peeler to it and peel the outer layer off. Now chop away my friends... chop away.
 

Next, take your chuck roast or flank steak and pound it really well with a mallet to tenderize it. Now season all sides liberally with salt and pepper. So here’s one part where I deviated from the recipe again. The first time I tried the onion powder that she called for. Although it was good… I just like the fresh stuff better. I feel like it lends a more natural flavor and when do you go wrong with onions anyway?… In my opinion, never. These precious jewels flavor the world! 


Preheat the oven to 350 degrees.

So first I put in my diced onion until it was clear and fragrant, and then I took them out and set them aside so that when the meat was browning, the onions wouldn’t burn in the high heat. Figured I’d do that first because any extra flavor cooked in is good… but whatever.


Heat the canola oil until rippling (I just used veg oil because it’s what I had on hand, but canola oil is going to give you a better brown on your meat so by all means if you have it, use it). Add in your meat and get a good sear/brown on all sides.


Drain or spoon off most of the fat from the pan. Stir in your sofrito, 2 tsp of salt, cumin, and bring it to a boil. You may have to add a little oil to get it creamy. Stir in the tomato sauce, water, alcaparrado, and bay leaves. Bring this to a boil again, then cover it with the lid, and pop it into the oven for about 2 ½ hours or until the meat pulls apart easily with a fork. I am always afraid of burning so if you’re like me you’ll check on it. Being a little obsessive, I checked on it after the first hour. That really wasn't necessary so I decided to check it again after the second. I’m glad that I did because the pan did look a little dry so at this point I added a little water.


And now for another variation from the original recipe … Her version tells you to add the celery after it's come out of the oven while it simmers on the stove top for another 10 minutes. I didn’t like idea of possibly undercooked celery because although I love celery as a seasoning, I DO NOT like crunching on it in a dish unless its finely chopped in a macaroni salad or something... so if you want the original version look below.


My way:  At the 2 hour mark I dumped in my celery and only a little over half of what she called for! (above calls for : 4 celery stalks, so technically I only used a little over 2 large).… and shoved it back into the oven for the remaining half hour. The meat was pretty soft at this point with a “fork check” but I decided what the heck, a little extra cook time couldn’t hurt, plus it gave the celery time to soften.

After 2 ½ hours take your pot out of the oven and let it sit until it’s cool enough to handle, which for me wasn’t too long. When you’re ready, grab two forks and begin pulling apart your meat; it should be tender and easy to pull apart. If you’re using the chuck roast make sure to pull out the center most clump of fat.


This is when I put the pot back on the stove and dumped in my 2 ½ cups of frozen mixed veggies and simmered for another 10 minutes or until they were soft.


If you want do it the Daisy way: after the 2 ½ hours in the oven and shredding your meat, this is when you’d add in your chopped celery along with the carrots and that only gets cooked for 10 minutes. After this you add in your peas and cook for a few minutes more.

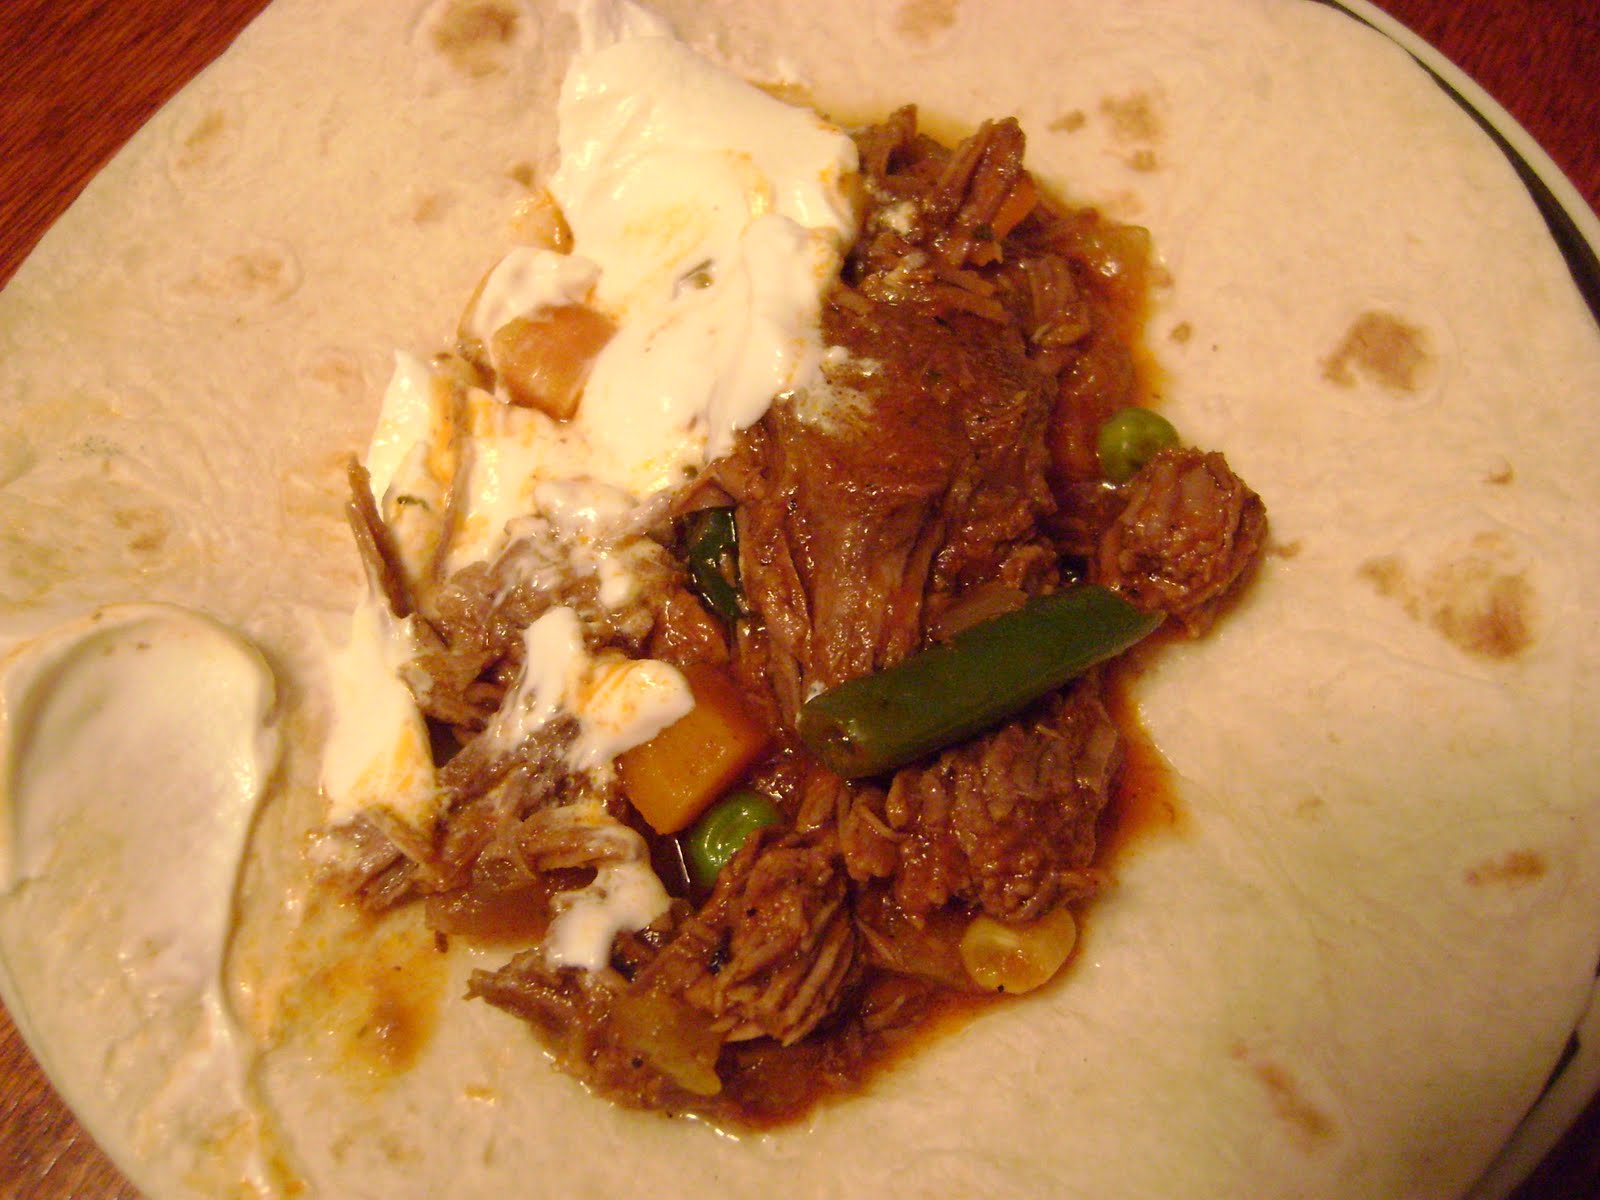
Once it was finally all done, I found some tortillas and sour cream. I know this version is not as traditional as it could have been but anyway here’s my end result, decide for yourself, I’m sure it’s good many ways.  SO EAT UP!

Tuesday, August 31, 2010

A Traditional Brownie- No bells or whistles needed!!


Okay so this is a simple Homemade Brownie recipe that I found a while back… and of course I’ve adjusted it to my liking!

And, what would a Traditional Brownie be without a Traditional Side-story tied in?

(I’m mentioning this story to tell you one thing. I will point out the obvious momentarily.)

About a week or two ago I made this delicious corn bread from scratch using a random recipe I found that was magnificent using fine cornmeal, flour, sugar etc. Pulling from an experience with a delicious Trader Joe’s corn bread mix, I decided to add fresh corn kernels to the mix by simply buying a cob at the Farmer’s Market and cutting them off right into the batter; super moist +YUMMY. Unfortunately, my taste buds are fickle and my stomach is small, so about 4 days into it I then had enough. My normal routine is to simply offer the unwanted food to my large hungry boyfriend who is usually waiting in the wings for me to tell him its okay to gobble up the rest, but this time it was different. Later on I found out that he was not particularly a fan of corn bread in general, this meant that by the 7th day or so it was still sitting there on the counter in its Tupperware, which meant it was time to go feed the birds.

So late that night my boyfriend tells me that he’s headed out with a friend for an event. About 5 minutes later his friend comes in and within minutes I hear rushing water and a loud frantic question… “Babe, did you put jalapenos in that cornbread you made!?” Instantly I jumped out of my sleepy daze and said, “GOOD LORD PEOPLE!! DID YOU BOTHER TO EVEN LOOK AT THAT BEFORE YOU ATE IT!!!!!” ….. you know what happened there, don’t you? . . .

Besides the fact that apparently not only do neither of them have a working set of eyeballs, they also do not have a working set of nostrils. Moral of the story folks is that you must remember that not all food comes out of “the machine” (interpret that how you like). The current world is so used to preservatives that getting a fresh loaf of bread is almost an inconvenience because it goes bad so fast. You want your food to go bad folks, it means that what you’re eating is real!!! If you could just stop shopping at the bargain warehouses buying the bulk food to last you through winter and shop for your meals day to day (it’s not that inconvenient) you might get used to the idea. Not saying that I’m able to do this all the time myself but its funny that two grown men wouldn’t bother to think that maybe the “CORNBREAD MADE FROM SCRATCH” might be bad after a week.

(This is the obvious part I mentioned I’d point out earlier in this story)

So do me a favor and remember that these ingredients are maybe a smidge “fresher” than normal when you enjoy these delightful brownies since they are “from scratch”… please try not to poison yourself people.

Onward! Here’s what you need:

9x13 pan or glass bakeware, greased and floured
1 1/3 cups All Purpose Flour
¾ cup unsweetened cocoa powder
1 ½ cups sugar
½ cup boiling water
1 egg
1 tsp baking soda
2 x (1/3 cup vegetable oil)
1 tsp vanilla (you’ll thank yourself every time if you avoid the imitation junk)
¼ tsp or generous pinch of salt

So if you remember what your Grandma told you about the secret to making brownies, you’ll remember that you aren’t supposed to stir/mix it very much. In general with baking and pastry there is a lot of “folding” unless specified otherwise… seriously fold it as few times as possible!!!!!

Start by preheating your oven to 350 degrees, or if you using a glass Pyrex like I did you’ll want to lower that by 25 degrees --- you’ll do this every time since glass is a better conductor of heat. Also you’ll need to grease your pan/glassware (I like to use good ol’ butter!) and then put in a little bit of flour and move it around by picking up the pan and shifting it, to coat the pan. You can gently tap to move it all around to make sure your pan is evenly floured.


Now take your mixing bowl and put in the cocoa powder and baking soda. Mix to combine. 


Next grab the freshly boiled ½ cup of water and pour it in along with 1/3 of a cup vegetable oil, mix until it has blended and thickened up. 


Now stir in your sugar, egg, and remaining 1/3 cup of vegetable oil. This recipe originally called for 2 eggs but that made them really cakey, and to me it’s not a brownie if it’s not moist, chewy, and delicious; so we’re only using one egg here! 


Finally it’s time to add your flour, vanilla, and salt. We do this last to avoid all that over mixing BS because the dreaded “over mix” will lead to cakey brownies as well and after all that fine work this my friends, is simply a travesty! Fold in the flour with a rubber spatula only until it is absorbed and then pour your batter into the prepared pan.


This recipe originally called for the ¼ tsp of salt, 2 cups of sugar, and 2 eggs. A fourth of a teaspoon is a “pinch” and I thought this wasn’t bold enough. Everyone can tell you that the best sweets have both sweet and salty elements to them. It’s almost like if you don’t add the salt you can’t really taste the sweet, it’s simply just bland. So I adjusted this to a larger pinch of salt but it may have been a necessity because of the fact that I only use kosher salt, which isn’t as salty, so you may want to keep the measurement the same if you are using the regular stuff. Besides being a little “bland” the first time around, in my opinion they were way too sweet so I also adjusted the sugar, and hopefully you remember the explanation on the egg adjustment from earlier in your reading.

Finally I adjusted the cook time. For me, good brownies are almost always UNDERCOOKED. Why? Because like anything coming out of the oven they continue to cook after wards and brownies are one of those fickle things that in my opinion just needs to be so you get that perfect balance of crusty outside and chewy gooey inside. When making cake you want your toothpick inserted into the center to come out clean. With brownies, you want it to come out so-so. This recipe originally called for them to come out after 35 to 40 minutes, so at the 30 minute mark I tested my center and took them out. 


Here’s what the toothpick looked like: 

Now, let them rest for at least 15 minutes. I guess a good description of the “done” sign for good chewy moist brownies is a toothpick that comes out relatively clean but may have a few bits clinging.

Add a little vanilla ice cream and you’ve got yourself another 30 minutes on the treadmill. Enjoy!


 Up next: Ropa Vieja aka "Old Clothes" aka Beefy Magnificence Courtesy of "Daisy Cooks".

Monday, August 30, 2010

Holy Frijoles!... Beans not necessary.


Just thought I'd share Saturday's Brunch at Bagel Palace with all of you. This is why I work out often, and this is why I love living... Yes, you are viewing that correctly. Thanks to Druid Hills' finest of Jewish Delicatessens (which I have reviewed before so I hope you have made it there since then!) we have the Knish Sandwich. I wasn't quite sure what this was going to look like but after I told myself to order something other than the usual (Bacon, Egg, and Cheese Bagel with a side of Creamy Grits... along with never ending diner Coffee) I thought to myself "Man, it's been a while since I've had a Most-Delicious Knish. I should order one today for splitsies with the boyfriend. And then as I looked up from the "Sides" only to see the Most-Magnanomous of inventions... yes my friends, and it was GLORIOUS.

A sheer heart attack waiting to happen. I thought maybe this would come out to me in the version of another bagel sandwich, maybe the meat of my choosing would be piled high and a little mini knish would be scrunched in there somehow.... but no, EVER BETTER; there was no bagel and the bread was substituted for deep fried potatoey goodness. It got one very loud, "HOLY CRAP!" when it came to the table and the waitress simply smiled at my reaction, it was even better looking than I had ever imagined. I chose for this sandwich to be graced with the presence of corned beef. Ample sliced beefy goodness... amidst two golden deep fried pockets of crisp and inside each was mashed potatoey heaven. With a generous squirt or two of spicy mustard this had to be eaten with a knife and fork in my opinion. And, with a side order of mayonnaise coated macaroni salad, a pickle on the side, and never ending coffee I was sure to go home that day with a steep order of yoga and park aerobics in the queue.... and it was WORTH EVERY BITE... so have a closer look, this is for you:


You're Welcome. Now go try it. Up next:  (Simple)-ly Delicious Brownies from Scratch!

Wednesday, August 25, 2010

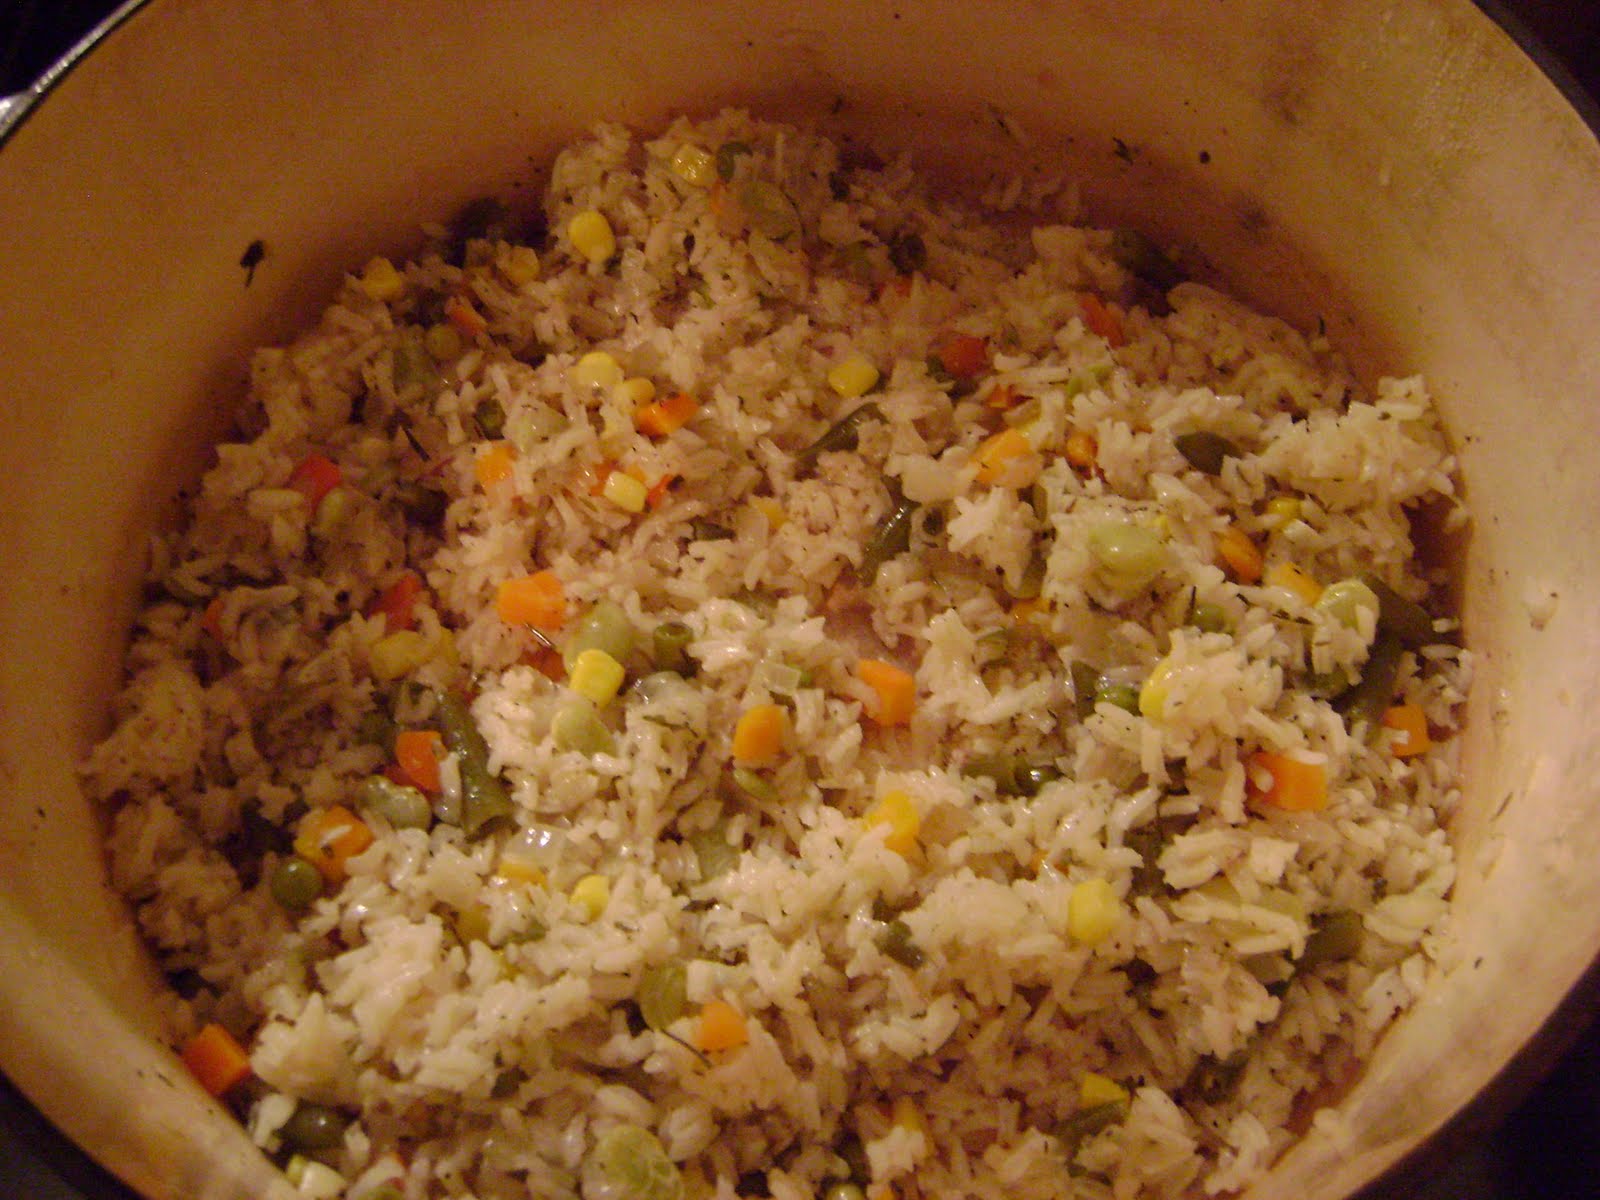
Pork Tenderloin stuffed with cognac-soaked Prunes and Pistachios, and Rice Veggie Pilaf


So as you know, I don’t get to eat meat as often as the regular American due to this fancy fun recession we currently live in but alas I like to think of 3 weeks eating only various types of beans and rice as a challenge! Can you handle the fiber!!! Okay that’s enough of that. So I was feeling fancy and decided to make this amazing yuminess that I’d learned about while assisting cooking classes. One was a stuffed Pork Tenderloin, the other was this amazing herbed veggie pilaf. I have to admit that when I first heard there’d be prunes involved my thoughts turned skeptic but let me convince you other wise, it is a great combination of salty, creamy, and sweet and it’s worth trying if you enjoy pork as much as I do. What makes this meal even better is that both parts are actually super easy to throw together so if you prepare you could easily have this done in a pinch!

Another thing I’d like to give an honorable mention to is the meat. I know I’ve written about this before but please notice that your local farmer’s market is the best place to get your best quality meat; preferably a farmer’s market that prides itself on proper animal diet, treatment, and lack of hormones. I choose not to shop at places like “Whole F-Paycheck” because they are still a chain and DREADFULLY EXPENSIVE, so I’m left with my awesome farmer’s markets. Still, this can sometimes be pricey. I know that in a regular aka gross grocery store you should be paying about $2.50 to $3 a pound for tenderloins in the pack so if you can find them for around $5 a lb at a “better practices” place that’s pretty dang cheap. The Farmer’s Market in Decatur is going to run you about $9 per lb for tenderloin (that’s one tenderloin)… so there’s some good perspective for you. And I say all this because one place I just happened to look wanted, I KID YOU NOT, $17  for 1 tenderloin and they were seriously TRIPPIN!

Here’s what you’ll need:

(Rice and Veggie Pilaf)

Oven proof dish (Dutch Oven works well)
1 cup Rice
1 medium Onion
1 ¾ cup liquid (any combination of Chicken broth, White wine, and/ or Water- I tried half Chx stock and half White Wine)
1 cup diced Frozen Veggies (variety is always good)
2-3 cloves garlic, crushed
1 Bay Leaf
½ Cinnamon Stick
1 Lemon Slice (seeds removed)
1 tbsp Herbs de Provence

Optional:
1 sprig fresh Parsley
1 sprig fresh Rosemary
1 tsp Salt
black Pepper to taste

(Pork Tenderloin)

Meat Mallet
Kitchen Twine
Oven proof pan or dish
Skillet (for searing)
1 tbsp each Butter and Olive Oil
2 (1lb) Pork Tenderloins
½ cup (4 oz) Cognac (can get a “single” for like $5 at a liquor store if need be)
¾ cup pitted Prunes, chopped (and soaked in cognac at least 1 hour)
½ cup chopped toasted Pistachio (setting aside 2 tbsp)
1 large Shallot, minced
1-2 large clove Garlic, crushed
1 cup Beef Stock
1 pinch of dried Marjoram
1 pinch of dried Thyme
½ cup heavy Cream
Salt and Pepper to taste (please note that the more store bought stock you use the saltier it will be before salting)

First thing’s First! Put your Prunes in the Cognac to soak for about an hour! Set aside.

Getting Started with the Pilaf

Preheat your oven to 350 degrees. Put your fire on medium and pour in a little vegetable oil to coat the bottom of your OVEN PROOF POT (ie dutch oven). When it’s warmed up toss in your diced onion along with the cup of rice and stir around to coat and blend. You want to do this for 3 to 5 minutes and try not to let the mixture stick to the bottom to prevent burning, you may need to add a little oil.  After this is done you’re ready to add ALL of the rest of your ingredients.

Note: I’ve made this twice already- the first time I followed the recipe completely and realized that I didn’t need all the extra rosemary as my “herbs de provence” actually had some in it, plus I didn’t have fresh parsley so I used some dried… Also I used some left over beef stock the second time around and instead of using mostly stock with a splash of wine I did half wine and half stock and liked it better! Really I don’t think there’s a whole lot of difference between using chicken vs beef stock. It’s what I had, so I used it! Of course, any time you have homemade stock and fresh herbs its going to be amazing but don’t fret if you don’t have it on hand. You will have a little more control over what goes into your food as far as the homemade stock goes, and if using fresh herbs you will want to make sure that you don’t over do it.

Turn the heat up to High to get it all to come to a boil. Once it does, let it boil for about a minute before shutting off the fire and putting your pot into the oven for 18 to 20 minutes. Make sure you have a tightly fitting lid, or if not, you can use a large piece of foil to fully cover over the top. Now would be a great time to make sure your “mis en place” (prep work) is done for the pork recipe’s ingredients. This includes cutting off any fat or “silverskin”, splitting each tenderloin open like a book- careful to not cut through to the other side, and pounding each with your mallet until slightly flattened (tenderizing!).

When time is up take it out of the oven and keep it covered (stove and stove top off!) for at least another 20 mins.

While you’re letting your rice sit you can start on your pork!

Turn your oven up to 425 degrees. Drain your prunes from their cognac bath, reserving the liquid for later. Take your tenderloins and salt and pepper one side, laying them side by side. Now take the drained prune pieces and spread about ¼ cup over the center of each, reserving the rest for later (1/4 left).  Between the two pieces, spread all but 2 tbsp of your chopped pistachios. Carefully roll the meat making sure not to lose any of the good stuff and secure each with pieces of kitchen twine.

Crank the fire up in that skillet and put in your butter and olive oil. Let it heat until almost smoking (but not burnt!) because we are trying to put a crust on each side of both! Using tongs or carefully with your hand place your pork into your skillet and sear; remember when its ready it will un-stick itself but be sure to watch so that you don’t burn your meat… or your house down (I consider both to be BAD). When one side is done rotate each time so that you get a good sear all the way around each wrapped tenderloin—this shouldn’t take too long. When they are done put them in your oven proof dish uncovered and then into the oven for about 20 minutes or when your meat thermometer reaches 145 -150 degrees when stuck in the middle-most part of each tenderloin. Remember meat continues to cook after it comes off the fire or out of the oven so you want to make sure that you don’t over do it. It also needs time to rest so that you don’t lose any of the awesome juices when you start slicing it up…. That, my friend, is always a PITY!; so be sure to check it the temperature when time is almost up.

In the meantime, you need to make your deeeelicious pan sauce. So hopefully by now you kitchen friendly folks know better than to clean off all the good brown bits of heaven from out of the bottom of your pan right? After you’ve seared your tenderloins you will have all kinds of goodness in the bottom of that pan and that will be going right into Sauceville so protect it with your lives if some random dish washing maniac suddenly bursts into your kitchen! Take that crusty skillet on a Medium fire and sauté your chopped shallot until they are soft (a couple mins). Now add your garlic and take that reserved pruney cognac and deglaze your pan with it. YES, proof that there IS A GOD. Cook this until the liquid is almost gone while you scrape up all the good bits that were once stuck on the bottom until it’s all floating around happily in the pan and add in your beef stock and herbs. Let this come to a boil until it’s reduced by half (you may need to turn the fire up a little). Add your remaining prune pieces, check for salt and pepper, and then add the cream to simmer until it’s thickened up a bit. Check again to make sure it’s delicious and that you’re not in need of more salt and pepper.

When the meat is done… because we didn’t make the mistake of over cooking it, and we let it rest for at least 5-10 minutes right? Remove the twine and slice carefully so that you don’t make a mess. You should have some beautiful tender pink next to those warm toasty prunes in the middle- don’t worry it’s not raw, and now all you have to do is plate it with your pilaf that’s been waiting so patiently (remember to remove the lemon slice, bay leaf, cinnamon stick, and in my case as seen above; the cheesecloth herb pack before serving). Garnish your meat with a little of the cream sauce and some extra pistachios bits. Hey if you have some field greens and a glass of wine to add go for it, make it a date if you have to. Whatever it takes to get you to try this. It’s better than that horrible cup of noodles you choked down yesterday I can tell you that; shame on you!

Friday, June 18, 2010

"Philly Favorites" --- A Taste of the Real thing!


Alright yall, time for another restaurant review for the deserving! This is how it all started….

So, boyfriend calls me in a frenzy one day saying that after work, we would be heading down to an awesome hidden treasure by way of recommendation from his cousin John. It was a discovery of cultural bliss long missed… It’s been about a year since I’ve eaten in Philadelphia which was a trip worth drooling over…… this means that it’s now time for a side story!!!

One of the things my boyfriend and I bonded over was that fact that we both were from what I like to call “Bubbles”. I’m sure other people have used this term before many times, but let me just tell you about our bubbles in particular.  Quite similarly, both Philadelphia and New Orleans are home to people who for the most part are blue collar workers. Growing up in a blue collar New Orleans home, for me, this meant I was surrounded by a people with immense pride for their culture and a knack for being infectiously happy no matter what they were doing--- Garbage Man, Mail Man, Oil Rig worker; it didn’t matter. With a culture and plenty of family firmly planted for over hundreds of years, I’m not sure that there really was much desire to live anywhere else; what for? We had everything we needed and a tight knit family for support. I think this is why places like New Orleans and Philadelphia alike make a mean PoBoy sandwich, or a fantastic Cheese Steak! It’s about pride in everything we have to offer big or small. Anyway back to the point…


After ordering one Italian Hoagie, one Cheese Steak, and an order of Cheese Fries I’m convinced, it really is a little slice of Philly right here in the southern state of Georgia! Just FYI I’m writing this review after going there a second time. “Why the second time?” You might be asking yourself... well the answer is because I couldn’t stop craving it! So, let’s describe the food shall we??


1 Italian Hoagie: with Ham, Salami, Capicola, Lettuce, Onion, Tomato, Pickles, Marinated banana (or mild) peppers, Provolone Cheese, Oregano, Oil and Vinegar, on a Roll

The onions were thin sliced like wisps of paper, sweet and …oniony. (I believe the secret to many foods is in preparation. Shape, size, and amount can make a huge difference in the taste of a dish, or a sandwich!) The peppers were mild, tangy with vinaigrette, and so perfectly crisp to the bite that with the addition of juicy sliced tomato, thin shreds of crunchy lettuce, and firm tart pickles it was a texture explosion! Cool salty deli meats in taste variance, super cheesy provolone (this is not that bland stuff you get at Kroger), and liberal shakes of dried oregano make this sandwich a dream come true…. Just like the last time I had one all the way up in Philly. Yep they got it. Remember, it’s about quality!

1 Cheese Steak: (Kept it simple!) Thin sliced, chopped Steak and American Cheese! On a Roll

We kept this one simple because although this is a little blasphemous I have to say I don’t particularly care for the traditional philly cheese steak which is actually simply chopped steak with a not so noticeable amount of American cheese, and red tomato sauce! The peppers are pickled and usually left out on the table for you to serve yourself should you want them, hot or mild. Granted you can get whatever you want on it but this is how a true cheese steak is served. Still, options include things like cheese (American or Provolone), sauce, bell pepper, and onions.

Despite having ordered the sandwich so plain, it was still amazing! A true cheese steak shrivels a little after being wrapped in the foil paper. Cheesy, Gooey, Beefy, Chewy, Hot, wrinkled but firm to the bite, and even potentially sloppy depending on what or how much extra you get put on the sandwich. Typing this is making me hungry. All I can say is the more I think about it, the more my heart starts to palpitate with anticipation for a future visit!

 I dare you to tell me that doesn't look amazing...

1 order Cheese Fries: Thin golden fries smothered in that ooey gooey “Yellow-Orange” cheese; not extremely health conscious here my friends but let me tell you, it’s a delicious break from your tedious healthy diet! Try them out when you’d like that extra umph. Simple, but full of salty french fry flavor. Mmmmmm salt.


“So, What’s the big diff!? Why are these better than just making a ham sandwich?”

Here’s why:

If you’ve ever had a Philly Cheese Steak or Hoagie you’d know 85% of it is the roll! I’m talking “different” as in leaps, bounds, jumps, high jumps, pogo stick jumps, and even Kangaroo Jumps different! Yes, you can grab any old roll or two slices of bread and make a sandwich but did you know that location affects baking? Sure you did.

Beside life long secret recipes guarded by families for generations and to the death, one of the factors in the secrets of baking is weather!!!! I really don’t know the exact science behind it but I can deduce after being to Philly a couple of times and growing up in New Orleans that there is one huge weather similarity that both places share… HUMIDITY.

This is a totally uneducated guess… and I’m probably completely wrong but for years all I heard were things like, “It’s in the water, It’s the weather, It’s blah blah blah.” And so far I’ve learned that the more humid a place or tropical a place feels the better the food. Don’t let Philly fool you like it did me, that place is crazy humid in the summer! There’s even a Philly tradition of steamed crabs because there’s seafood up there! Oh what little I knew beforehand. Judging by my origins in New Orleans, here’s my ghetto assumption: humidity + water = good stuff for food. Also pride in little nuances like “shakes of oregano” or homemade oil and vinegar mixtures can make a world of difference!

Yes yall, Philly Favorites, what a savior… the bread is shipped in from Amoroso's Bakery in Philadelphia since attempting to get the rolls “just right” on your own here in Georgia is just about IMPOSSIBLE. Similar to the Po-Boy’s French bread in a lot of ways, a good Philly roll is soft but light, and has pull to its bite. Fantastic. Don’t be fooled by your neighborhood grocery, unless its shipped in, its not the same.

Besides the bread, the sounds at “Favorites” are simply musical; kind of a symphony of anticipation if you will. There’s the clinking and clanking of metal to metal while the steak is chopped and fried on a large grill off to the side. This all happens as the super friendly staff all sing along to the best of old school favorites from stations like Magic107.5 or Kiss104.1 while it plays in the background. Now I really REALLY like it here… I can sing along to some Mint Condition while I wait happily for my food; that gets a “thumbs up”! And who doesn’t like singing along when there’s delicious steak frying in the background, or the smell of marinated peppers is wafting in your face. I can’t complain.


So as you saw pictured above, the food comes and it’s a tray with two long subs wrapped in paper. I like it!! Just like in Philadelphia, it’s simple and to the point. A good sandwich needs no fancy plates, or high prices! My boyfriend and I ordered one of each so that we could have one half of both! Oh the for the love of “Philly Favorites” !!  At the end of our meal there was even water ice. I got a small Mango, and the boyfriend got a small (but layered) “Watermelon/Cherry/Blueberry” a sweet, smooth, creamy palette cleanser. The magic is that it’s similar to Italian ice but the ice isn’t shaved, instead it’s mixed and made like ice cream and frozen in vats, awesome just like I remember it a year ago!


 Get me wrong you shall not, I have only highlighted a few items on their copious menu; there is something for everyone…. everything from a Corn Beef Reuben to a Flounder Hoagie and a milkshake or ice cream. Best part is, it’s reasonably priced and worth it, independently owned, authentic, and delicious. You may have to leave Atlanta for a little while but what’s a 20 minute drive for delicious bliss, when you can spend 20 minutes just trying to turn at the intersection of Piedmont and Monroe! 


Go pay them a visit; you’ll be happy you did.

5851 Buffington Road Ste J
Union City, GA 30349
(404) 305 – 9099


Check them out on Facebook here!… Philly Favorites <3

Thursday, June 3, 2010

Cross Cultural Deliciousness.. a Birthday Pictorial


As my sister affectionately likes to term these gatherings : "Crindian" <3

Kebabs
Marinated Ribs (Cut Across the Bone-k bbq style!)
Chicken marinated in Indian spices
Indian Flat bread
Seafood Boil: Shrimp, crawfish, and bluecrab!
And delicious homemade Sesame St. Cake!! (seriously, the chef's amazing)